Thursday, October 28, 2010

Button Hole Tutorial!!!

I have been intimidated with using any other foot than the presser foot that came on the sewing machine... I use it for everything. I started off using just a straight stitch, and now have mastered the zig zag... today I learned to use the button hole foot... I decided to give it a go, even if I ruined the dress I was working on last time... This time IT WORKED. I have tried in the past on several fabric remnants, a few dresses, all to no avail...

I will let you know what I did so you, in turn, can learn the wonders of the button hole foot. First, you determine what button you will use. You then take this button and place it in the slot that goes up and down. After putting the button in its spot, you put the foot on the machine, making sure to drop down this little lever that looks like it has a button hole on it... Then, you just put it in the right spot, where you want the base of the button, and it will start sewing upwards... it worked perfectly!!! I can't believe it! After all of those tries, it worked. Just remember to START AT THE BOTTOM of where you want the button hole to be... not at the top. It will go backwards... keep your foot on the petal and just keep pressing until it is done. It will stop. It turned out too cute on my little fall dress. I wanted to make a cap sleeve, and not just a little spaghetti strap. It turned out just like I wanted. The dress is too big for princess, but she will grow into it... I think it will be perfect for Thanksgiving. That with a little pilgrim hat... what more could you ask for???

Sorry... no pics at this time... I will have to take some for you tomorrow. Nighty-Night-Sweet Dreams!

Wednesday, October 27, 2010

Bloomers Tutorial... Part 2.

After you have the elastic in the waist, you then move on to the leg holes. Start by ironing down the edges so that you will be able to better correctly, and straighly, (is that a word... probably not)... anyway, you iron the seam down, so that the raw edge is inside... and make a little pocket for you to thread the 1/4 inch elastic through, making sure to leave space at the top of each leg hole for pushing the elastic through. That probably didn't make sense... basically, you sew around each leg hole, and make sure not to sew all the way around so you can thread elastic through.

In order to thread the elastic through, you need to get an itty-bitty safety pin. First take the small safety pin and pin down about 1/2 inch through it, so that it the safety pin can push through and it not come undone from the safety pin... Then take a BIG safety pin and affix it to the other end, this is so when you get to the end, you can still have a hold on the other end. If not the elastic pulls all the way through and you have to do it again... It happened to me several times... very frustrating... You might have to do it a few times to get it through... it takes a little bit to get it right, because the different angles of the fabric... but eventually you will get it... after you do... pull both sides of the elastic, and sew the two together... I used 12 inches of elastic on each leg hole, and cut off about an inch and a half to make it be the right size...

The bloomers I did tonight, I added the ruffles before sewing. It added a few challenges, but in the end I liked it because it helped to make sure the ruffles were even and not slanted... so... you can either put them on first or last... In my case I have done it both ways, and the only problem with first, is if you put the ruffles too close to the leg seams, because it causes the fabric to turn, which isn't noticeable when the elastic is in place because it is gathered, then you can't easily push the safety pin through... so you have to be careful... I put three layers of ruffles. The picture isn't great, but my photo guy is working on his skills. Her outfit was a hit. Very cute and matched.

Here's a picture of the finished tiara ruffled bottom bloomers. Perfect!

Paired with a rhinestone initial onesie, and flirty baby leg warmers. So cute!

Monday, October 25, 2010

Bloomers Tutorial... Part 1.

A little over 8 weeks... I can't believe it.... Every year, it happens... but every year, it gets closer and closer together... When I was a child, it took sooooo very long for Christmas to get here each year... I remember waiting and crying that it wasn't right then, and that it seemed to take FOREVER for it to come, these days, however, things have changed... It is a hectic rush it seems from one holiday to the next. Do I have everything I need? Who is making what? Who is getting
what? Where do I need to go? What do I need to do? This year my household is especially busy with the addition of another child... which brings with it happiness as well as more to do... At the time she will be 6 months old... starting to crawl, no doubt, and getting into everything...
Anyway... I am sure you didn't tune in to hear about that... Here's the bloomer tutorial...
First, you make a simple bloomer pattern...
Then you sew on the hips, and crotch. Then you cut 18 inches of elastic. After that put a pin in at 9 inches to know when you sew where the elastic should be when you stop sewing... You don't want too much elastic left over or not have enough where it is not stretchy at the end... Then you start sewing, while pulling the elastic from the back, but pulling it taunt in front... you will m
ess up... It is a learning process... Know that no matter what, it won't look too bad because it will gather at the elastic. Turn the edge down when you sew so that you do not have a raw edge hanging out. Let me say again... It is hard to do. It will take a few tries with the elastic to get it right.
After that you fold down the leg holes and sew a pocket to thread your elastic through... about a quarter inch. This is not hard... you do a straight stitch around the openings and then thread the elastic through with an itty-bitty safety pin. This ends Part 1... There's not much more to do to them... but a girl has to have embellishments... so stay tuned.


Don't forget to backstitch. No one wants their bloomers to fall apart.


Sunday, October 24, 2010

The Reindeer Dress/Headband/Bloomers/Jacket DONE


Alright, so the Reindeer Dress is complete!!! Bows, Bloomers, and Blue... Who could ask for more...????

I made a simple A-Line dress, with spaghetti straps, added a reindeer accent to the headband, and made the fleece sweater jacket to go with it... Turned out good... Like it very much.

Thursday, October 21, 2010

Recent Additions...


I am mostly done with the Reindeer Dress. I have the bloomers done, and the dress, headband, and jacket are just awaiting some buttons and bows. I will post a picture of it for you to see the progress.

I am also working on about a dozen different bloomers. I have cut out the pattern, and just need to sew and add the elastic. I have these fabrics... sooo cute. I like the Apple/Pear pattern most...
I am going to make my own version of Apple Bottom Bloomers... :)

Having a LOT of fun making them. Hoping to have a lot of them done for the craft show in a few weeks. I am loving the patterns, and the birds are super cute.

From left top: Brown with pastel butterflies, Baby Pink with Twinkle Twinkle Little Star, Pink Paisley, Pastel Birds with Hearts on Black Background, Pink and Brown Birdies, Purple Princess Crowns, Pink Roses on White, Apples and Pears on Sky Blue Background, Pink Breast Cancer Awareness Hearts. These are all soooo cute, and going to be so cute done. I have a few other fabrics that I am working with, and will post pics soon.

Prices:
Dress ($12), Jacket($15), Matching Bloomers ($6), and Matching Headband ($5)
Bloomers $6 each. To get comparable products elsewhere, they are $12-$16 each. If you would like a certain pattern, or to match an outfit, please email.

CreativeAccentsandAccessories@gmail.com

My Plan...

My plan for the day was quite simple, get up go to the gym, go to a Bible Study, then the mechanic... All of this was unraveled by one thing... I lost the van keys... Locked them in the van last night when the hubs and I went to my little retreat, known to other people as a craft store. Inside I perused aisle after scrumptious aisle. What would I find? What would be on sale... I had such a lovely time I forgot when I got outside that I put my keys next to the carseat while the hubs put LM (Little Man) into his carseat. This morning I asked LM where they were, he didn't know... He us under two, but can tell you anything... If he HAD known where they were, he would have told me. So he and I tear up the house looking... I call hubby at work he has no idea... By this time I have missed the opportunity for the gym, and am encroaching on Jesus time... I call AAA because I realize I probably left them in the vehicle during my euphoric sojourn to Joann's Fabric Store... The AAA man gets here, literally takes less than a minute to get inside my vehicle (really makes you feel safe)... and I am off to Bible Study. Got there 20 minutes late, but did make it... Went by the mechanic, almost had to chop my right arm to pay him... now am home and feeding the girl while LM (who was in despirate need) is sleeping. I am about to start crafting. I see bloomers in my future... It is a future with invisible diapers, where no poop exists, and bottoms are covered with birds, flowers, hearts, and so much more! Happy Crafting... Will post pics soon.

Silent Auction- T-7 days (I got the date wrong...) Added some time :)

Tuesday, October 19, 2010

The Reindeer Dress/Headband/Bloomers

I started today with the best of intentions. My plan was to go to the Y, then the zoo with the two little ones, eat lunch there, drive home, put little ones down for nap, and me be able to craft... I have a few MAJOR projects to do, and, not a lot of time to do them. So... I went to the Y, worked out, took a shower without children screaming outside the door, or the ever-so-scary silence, which you know that means something is wrong... and you JUMP and RUN out of the shower to find them under the kitchen sink, or some other disaster in front of you... anyway, got to take a shower, actually got to blowdry my hair... put on a little makeup... We went to the zoo, got to see all the animals... on the way back my plan came unraveled. The LM (Little Man) fell asleep in the van on the way home... He slept a total of 13 minutes... I tried unsuccessfully/desperately to get him to sleep... all to no avail. He decided to be completely awful... banging on everything... he said it was a drum... it wasn't. I did not get to craft... Tonight at 6 after the hubby got off work, he took both BOTH kids with him and left me 2 whole hours to myself... :) (I have the best husband in the world) I was sooo happy! I got to work on the reindeer dress for the silent auction. I am almost done with it! I have the headband done, the dress and matching bloomers. I got a lot done on it. While I am not done I should be able to finish relatively easily. I just have to add embellishments. I will post pictures tomorrow with the finished product.

Monday, October 18, 2010

Santa Dress...


Today I worked on the Santa Dress. I finished pretty quickly. I was done by nap! To make I took a roll of tulle, and cut strips that were 12 inches long after measuring my little girl to see how big she was. She was 12 inches from her shoulders to her ankle. So, I wanted it that length, so I cut literally a hundred strips, and just slip knotted them to a small piece of elastic, leaving a little space between each strip.I joined the elastic to form a circle, and put elastic all around it. After that I took a maribu strand (I don't know what you call it)... Sewed that to the length of elastic. (To find out how much elastic to do, take your child's measurement under their armpits, and add an inch.) Then I took and sewed the elastic black halter strap on. Her's was 16 inches, but it was much too big, and I ended up cutting off two inches. I carefully lined up the satin ribbon to sew to the tulle to make the strip, and then sewed making sure to pull all the tulle down as I sewed as not to sew the wrong side to it... I did it twice, once at the top of the ribbon, and once at the bottom of the same ribbon.

I took a strip of maribu and cut it a little more than her measurement under her arms, and then sewed that to the tulle on the elastic. It turned out wonderfully. Now to make a hat!!!

Countdown to the auction- T-5 days.

Sunday, October 17, 2010

Silent Auction Countdown Begins!

I have six days left to finish TWO dresses. One reindeer dress, and one Santa tutu dress, both of which MUST be completed by Sunday, October 24th. I already started on the Santa tutu dress, because I am still looking for ideas on the reindeer dress. Here's an outline of the Santa tutu dress. I took and measured my little model. I then took and measured around under her armpits. This was 16 inches. I took and got 17 inches of elastic and overlapped it an inch, and sewed it to where it was one loop. I then measured her body, from collar bone to her ankles. That was 12 inches. I doubled it because the tulle needs to be two times as long to be able to wrap around the elastic band. That's where I am now. I have about half of the elastic covered. Tomorrow I will finish the other half, along with sewing on the maribu trim, adding the rhinestone accents, and starting on the headband for the reindeer dress... I am not sure what style I will make the reindeer dress so I am trying to take it easy and work on that part last. My main concern is the sleeves... It is a winter dress and needs to have some sort of sleeve. I am making a matching jacket, so, it does not need to have long sleeves... but some sort of sleeve would be good.

I am sooo looking forward to the silent auction. It gives me the perfect excuse to dress BG (Baby Girl) up and get some pictures taken. Well, good night, and hope you have a good night. Happy Crafting.

Saturday, October 16, 2010

Carseat Cover


Today, I really had no confidence in myself, so I did not take a picture of this before I started... I had an old sling, that had a beautiful pattern, but was not my size. It was a hotslings kind, a solid piece of fabric. I loved the fabric, and every time I saw it, I wanted to use it, but it was just too big for me. Yesterday, when I went to the store, when we came out it started pouring down raining... I didn't have ANYTHING with me, no blanket, no umbrella... I was alone... no one to bring the car to the building... so... that led to my decision to get a carseat cover. Much to my dismay, the consignment shop I always go to, did not have any that were girlie. There was only one there, and it was red with black. Also, when we went to the pumpkin patch, I put a blanket over Miss BG, and it kept falling on the ground... all of this to say, I decided I needed a cover. It would keep her warm, dry, and cozy... so... After the disappointing visit to the consignment shop, and seeing this sling that I lamented and couldn't wear, this morning it struck me... I could MAKE one...

This is what I did. I took the sling... cut it in half from the top to the bottom. Then I took the other side and cut it. I ended up with two large rectangles. Those I took and sewed together making one big rectangle. I measured the carseat. It was 16x30 something like that... I took and added ten to that, to make sure the sides would come down. That's the key. Measure your carseat, and add 10 inches all around. Put your fabric wrong sides together and stitch it together. Then, fold over the edge twice (about half an inch each). Then sew on the fold. Then I measured the carseat bottom. It measured 60 inches. After you stitch all the sides, you push through a safety pin attached to elastic. I took a wooden dowel rod, shoved the safety pin into the end of it (with the elastic attached to the safety pin) and then wound that around all the edges.

Then I cut a line down the middle. Using bias tape I sewed the sides with that. Then I cut a semi-circle and used bias tape on that. I put Velcro on the straight cut, with the scratchy side away from baby, and finished with a little tab to pull up the flap to be able to pull to see baby while inside.

It was super fun, and turned out SUPER CUTE... We used it tonight, and it was a huge success.

Friday, October 15, 2010

Fun Friday!

Today was a pretty good day. I went to help a friend with some stuff, but still got to come home and play with my new gathering foot, since Brother does not have a ruffler foot for my machine. It works pretty much the same, and so far I am satisfied with it... just trying to figure out how to use it. I was able to change the presser foot, which is a big step for me, because I never have... I made another pair of bloomers today... red with little white hearts. Too cute. I learned how to make the legs the right way on the bloomers... so that they are elastic. I measured Eliza to be able to make another dress... which I started sewing, but haven't finished. I am trying to make cap sleeves for it... It is the brown pattern I have had for a while... I got a coupon from Joann Fabrics... and one for Michaels I plan on using this week.

I am going to be in a craft bazaar in Clarksville, IN soon, and I am trying to get all my ideas down on what I want to have there to be able to sell... My favorite colors are pink black and white... I am thinking about doing gift sets for diaper covers, loveys (little versions of rag quilts), embellished onesies, hairbows, hairbands, dresses, Eliza Janes, tutus, pettiskirts, etc. I was also thinking about making Mother/Daughter aprons, and trying to think of other stuff... any ideas??? I am going to be going to a bazaar tomorrow to look at what they have for sale, to be able to see what will sell... etc. Anyway... I had a pretty active craft life today... tomorrow my goal is to start another dress, finish the one I worked on, and make matching bloomers, and figure out how to make a carseat cover... I need one... It is getting cold. I went to my shop here in town, and they don't have ANY girlie ones. I have one that is plain and boyish... I don't want boyish... I had boyish... now I have the girl... it is ruffles, bloomers, and pink all the way! So... It will be cute and girlie... maybe zebra... hot pink stripe, and that would be NICE... I would like that.. That sounds cute... I should do that... sounds like a plan... need to get some black and white zebra. I am going to line the inside with fleece... nice and warm. Anyway... Going to bed. Tomorrow is another day.

Wednesday, October 13, 2010

Ruffled Butt Bloomers!!!--$8/pair


Alright... I have been ooggeling Ruffle Butt Bloomers forever. I wanted to buy them so bad. They would call to me from the kiosk at the mall, saying "Buy Me, I am so cute.... You have to have me..." The price tag said otherwise. I do not deny their innate cuteness, and utter adorableness that exudes from every fiber... I just could not afford to pay $16 for a pair of panties that will spend more time next to poop than anything.

Tonight... I broke down... I absolutely HAD to have those bloomers for my baby... so I made some! Absolutely adorable!!!! I love it.

It was not completely without a hitch. I did leave out the part where I killed it. I, accidentally, when sewing on the ruffles, sewed straight through the front and back... completely affixing the front to the back... it was a nightmare... but the seam ripper fixes anything if you go slow enough. I didn't put it around the arm of the sewing machine, and it was absolutely horrible. It is fixed now.

As Promised...


Wednesday brought many things... a pounding migraine, and a promise fulfilled... I finally got to make a pair of bloomers... after many failed attempts... I finally did it. I took a pattern from here and it worked wonderfully! I have 2 more sewn, but need to buy elastic still, so off to Hobby Lobby I go... Happy Crafting all! I will post tonight more pictures of what I make. It is sure to be cute!!!

Sunday, October 10, 2010

...Sunday, Sunday...

To all my faithful readers and friends... I have not left you... I am still here... I am out of town, and have not been able to craft... With that said... I fully intend on making it up to you. I am going to start off with something small and simple when I get back... perhaps a bib, or something of that magnitude. Wednesday, be prepared, because that is going to be the BIG crafting day. Before I left, I did create a lovey blanket, with ribbons attached, but did not get to post a picture or description of it, because I was dealing with a friend's son being in the emergency room, after a terrible bicycle accident... don't worry, he is ok... Then I had to pack, and it was a terrible trying to pack with a almost 2 year old running around behind me, and pulling everything out of the suitcase... Note to you: Don't try to pack when there are little people around... OR put the suitcase where they can't reach... that would have been helpful...
Anyway... so that's my plan. I didn't abandon you, and I am going to get some more fabric to make some more stuff soon. That's pretty much it for now. Doing good, and thinking of more stuff to make. Feel free to look back on old posts, in the meantime...

Wednesday, October 6, 2010

Flirty Leg Warmers...


I wanted to make something flirty and cute... I made these... I think they are perfect.
$5 a pair

Also, today I signed up for a craft bazaar... It's in Clarksville, IN, November 6th. This is my VERY FIRST attempt to sell some of what I make. Hopefully it will go good and I will sell a few things.

Monday, October 4, 2010

Mittens...


It is soooo cold out, that BG just had to have matching mittens with her pink zebra dress which will go perfectly with her black overcoat. I took her hands, put space around them, and then cut around it... used that as a base for the mittens. I cut four Cut out some fleece for the inside. It looks very cute.

I also made plain black leg warmers for her. I will take a picture of her in all of it together soon. For now, here are her mittens.

Sunday, October 3, 2010

Made something new...


This morning for church, BG needed something special to wear to church. I wanted to put her in the pink zebra print dress, but, alas, it was TOO cold this morning. We woke up to temps in the 40's... only a few days ago it was 90! The leaves are finally starting to turn, but it has come so quickly this year... Where were the days in the 70's??? O well... I didn't have anything to cover BG's shoulders... I had about thirty minutes before we had to leave for church... so I decided I would take a jacket that is too big, and not the right color, and use it to make a pattern for a new one. I had some black fleece laying around... and decided I would use it... I cut it, and sewed it, and within thirty minutes I had this BEAUTIFUL PERFECTLY MATCHING sweater for her to wear.

She loved it, however, she could not stay awake for the pictures. It is hard work being a model.

It turned out better than I expected... I really expected that I would sew the arm to the front of it... I never had put sleeves on anything... I made my first dress on Wednesday... So... I am less into a week making these things... so... It turned out perfect. I cut the fabric to make it curve in the front, and not make it button all the way down... wanted to make sure you could see the dress... of course... It was so much fun, and only took a little while to make. Last night I made the headband to match the dress. Perfect outfit. If you want this for your little girl, for a shower gift, or for someone you know, the cost is $50 for the set. Includes dress, headband, sweater, and baby leg warmers.

Saturday, October 2, 2010

New Dress... Brown and Blue Paisley Print Spaghetti Strap Dress


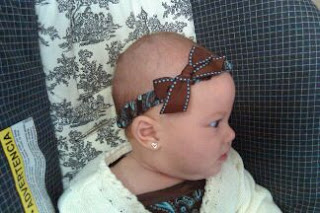
I have learned how to use bias tape, and learned how to make an elastic headband with a bow. It is absolutely adorable, and matches the dress exactly, because it is made out of the same fabric as the dress... It turned out absolutely perfect.

I went to Target today and, what do you think I saw... BABY LEG WARMERS... $9.99 a pair!!! I make the same thing... SAME THING... and offer them at a FRACTION of the cost... $5... can't beat that... Anyway... so people, if you want baby leg warmers, let me know... because they are CUTE...

Friday, October 1, 2010

Hot Pink Zebra Print Dress and Heart Leg Warmers


Today was a very crafty day for me. I made a pink zebra print dress, a blue and brown paisley dress, and a pair of leg warmers. All in all, I learned something new. Bias tape, is your friend. It can be used on the outside, to accent, or on the inside to make arm holes look more finished... I am still going to add to the brown paisley one... so I am not putting up its picture yet. I want to add a ribbon to the waist and put a bow in the back. After which, I will post pictures.

Leg warmers are undoubtibly the biggest fad I hoped would never come back, but now that they are here... might as well "warm up" to the idea... *wink wink*... that even made me laugh... I got a few pairs of knee highs and cut them, sewed them, and PRESTO...
instant baby leg warmer... Too cute... BG (Baby Girl) loved them, kept kicking her feet, looking at them... she wore herself out... just kicking away. LM (Little Man) loved them too. He kept looking at them... saying "Baby", and "Heart, Boom, Boom" (because that's what a heart does...)... Anyway, they turned out adorable.